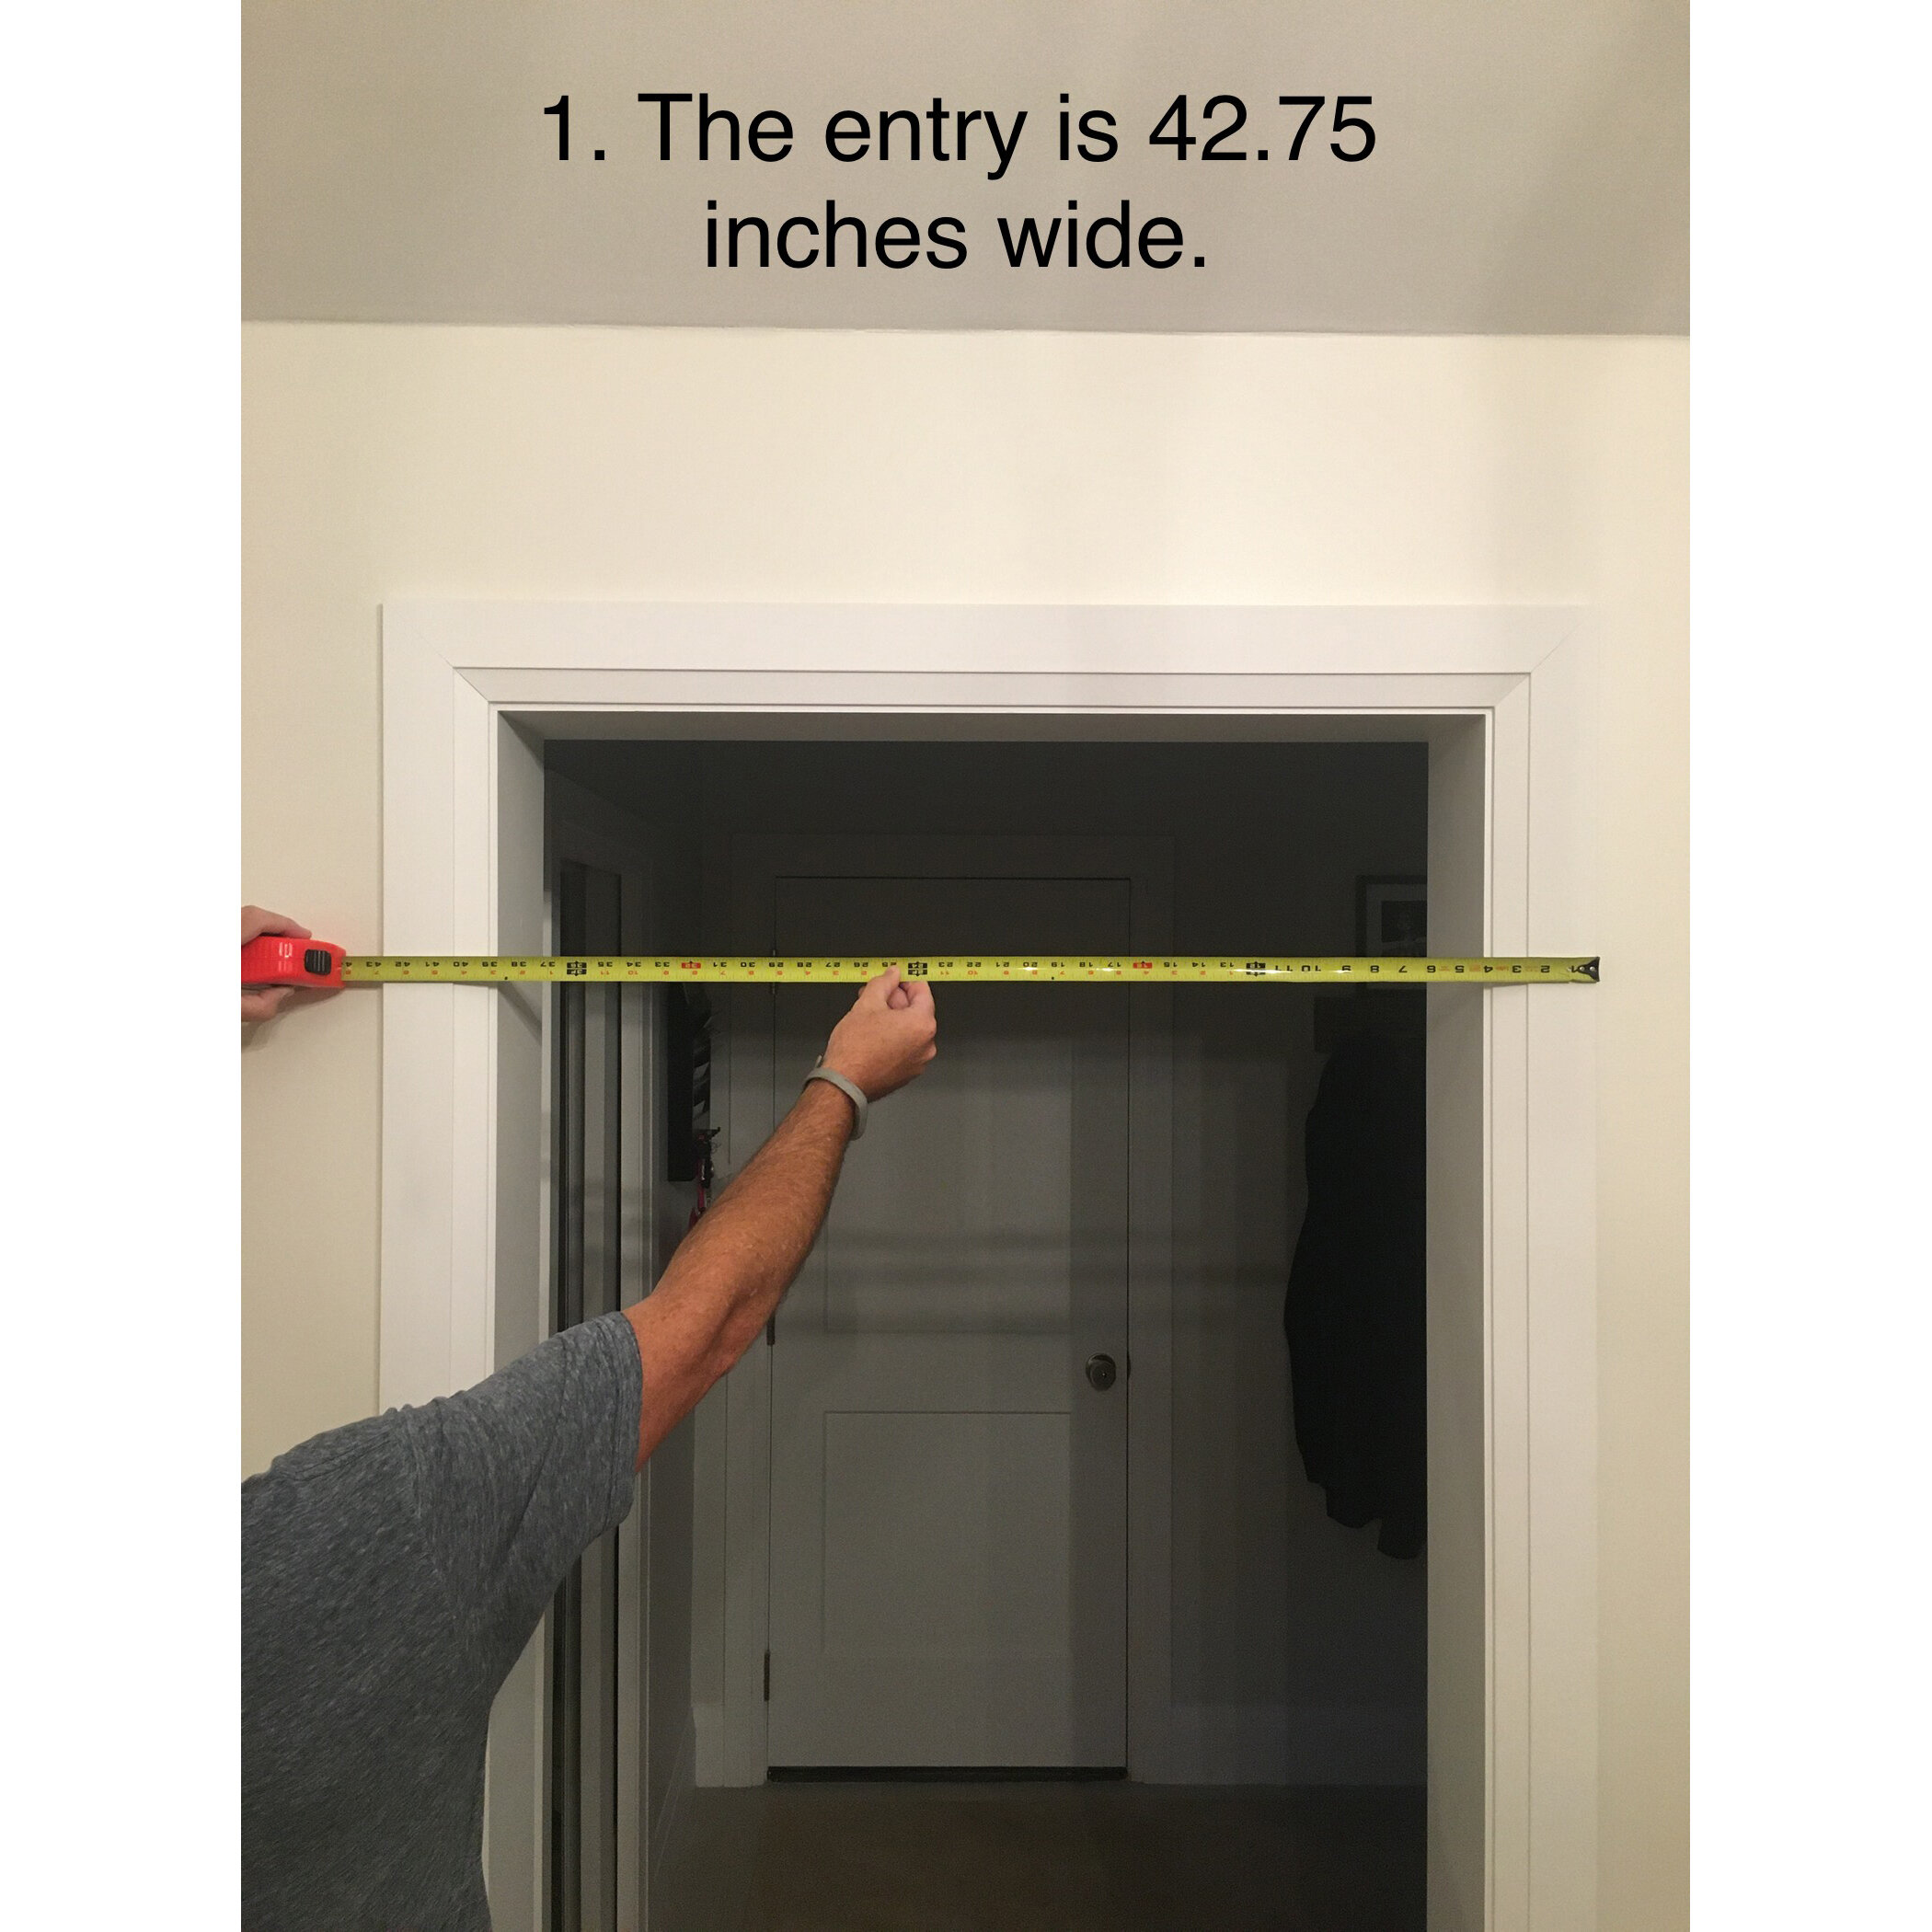
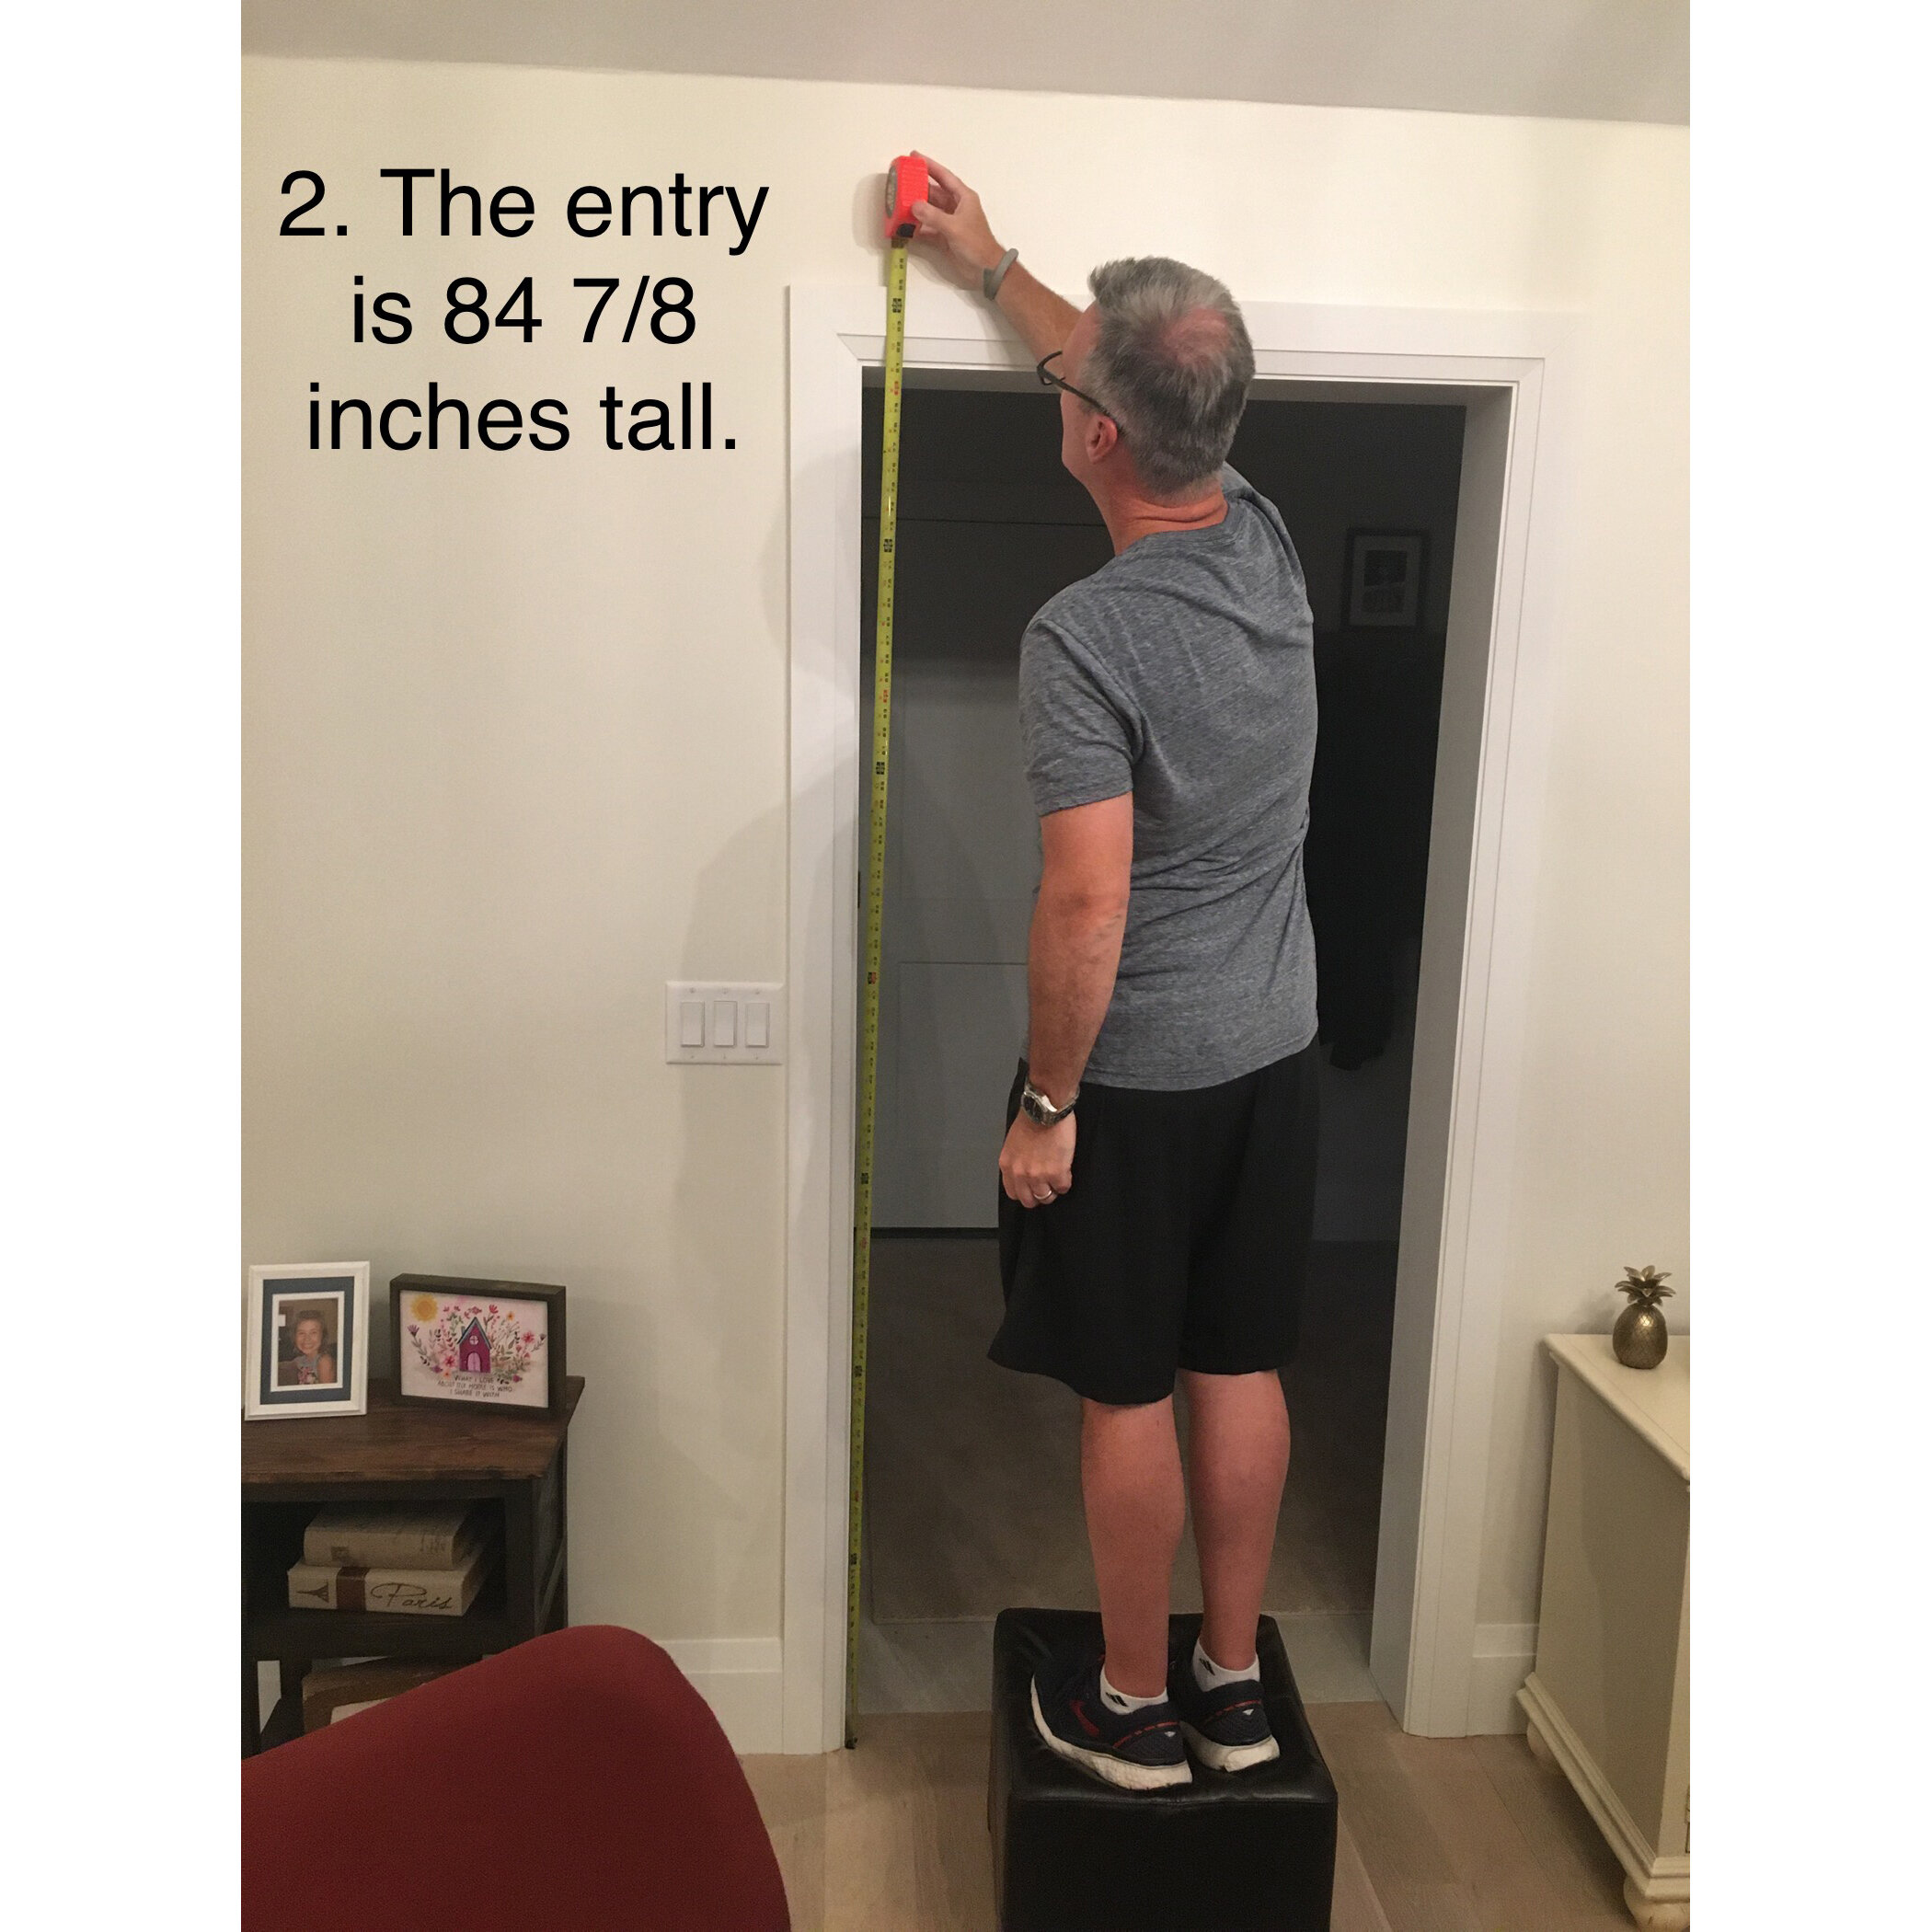


The Above is an Example. All you need is a smart phone and a tape measure!
Tightly hold the tape and make us some pictures like the first five examples above, and then we can create your door and install it perfectly!
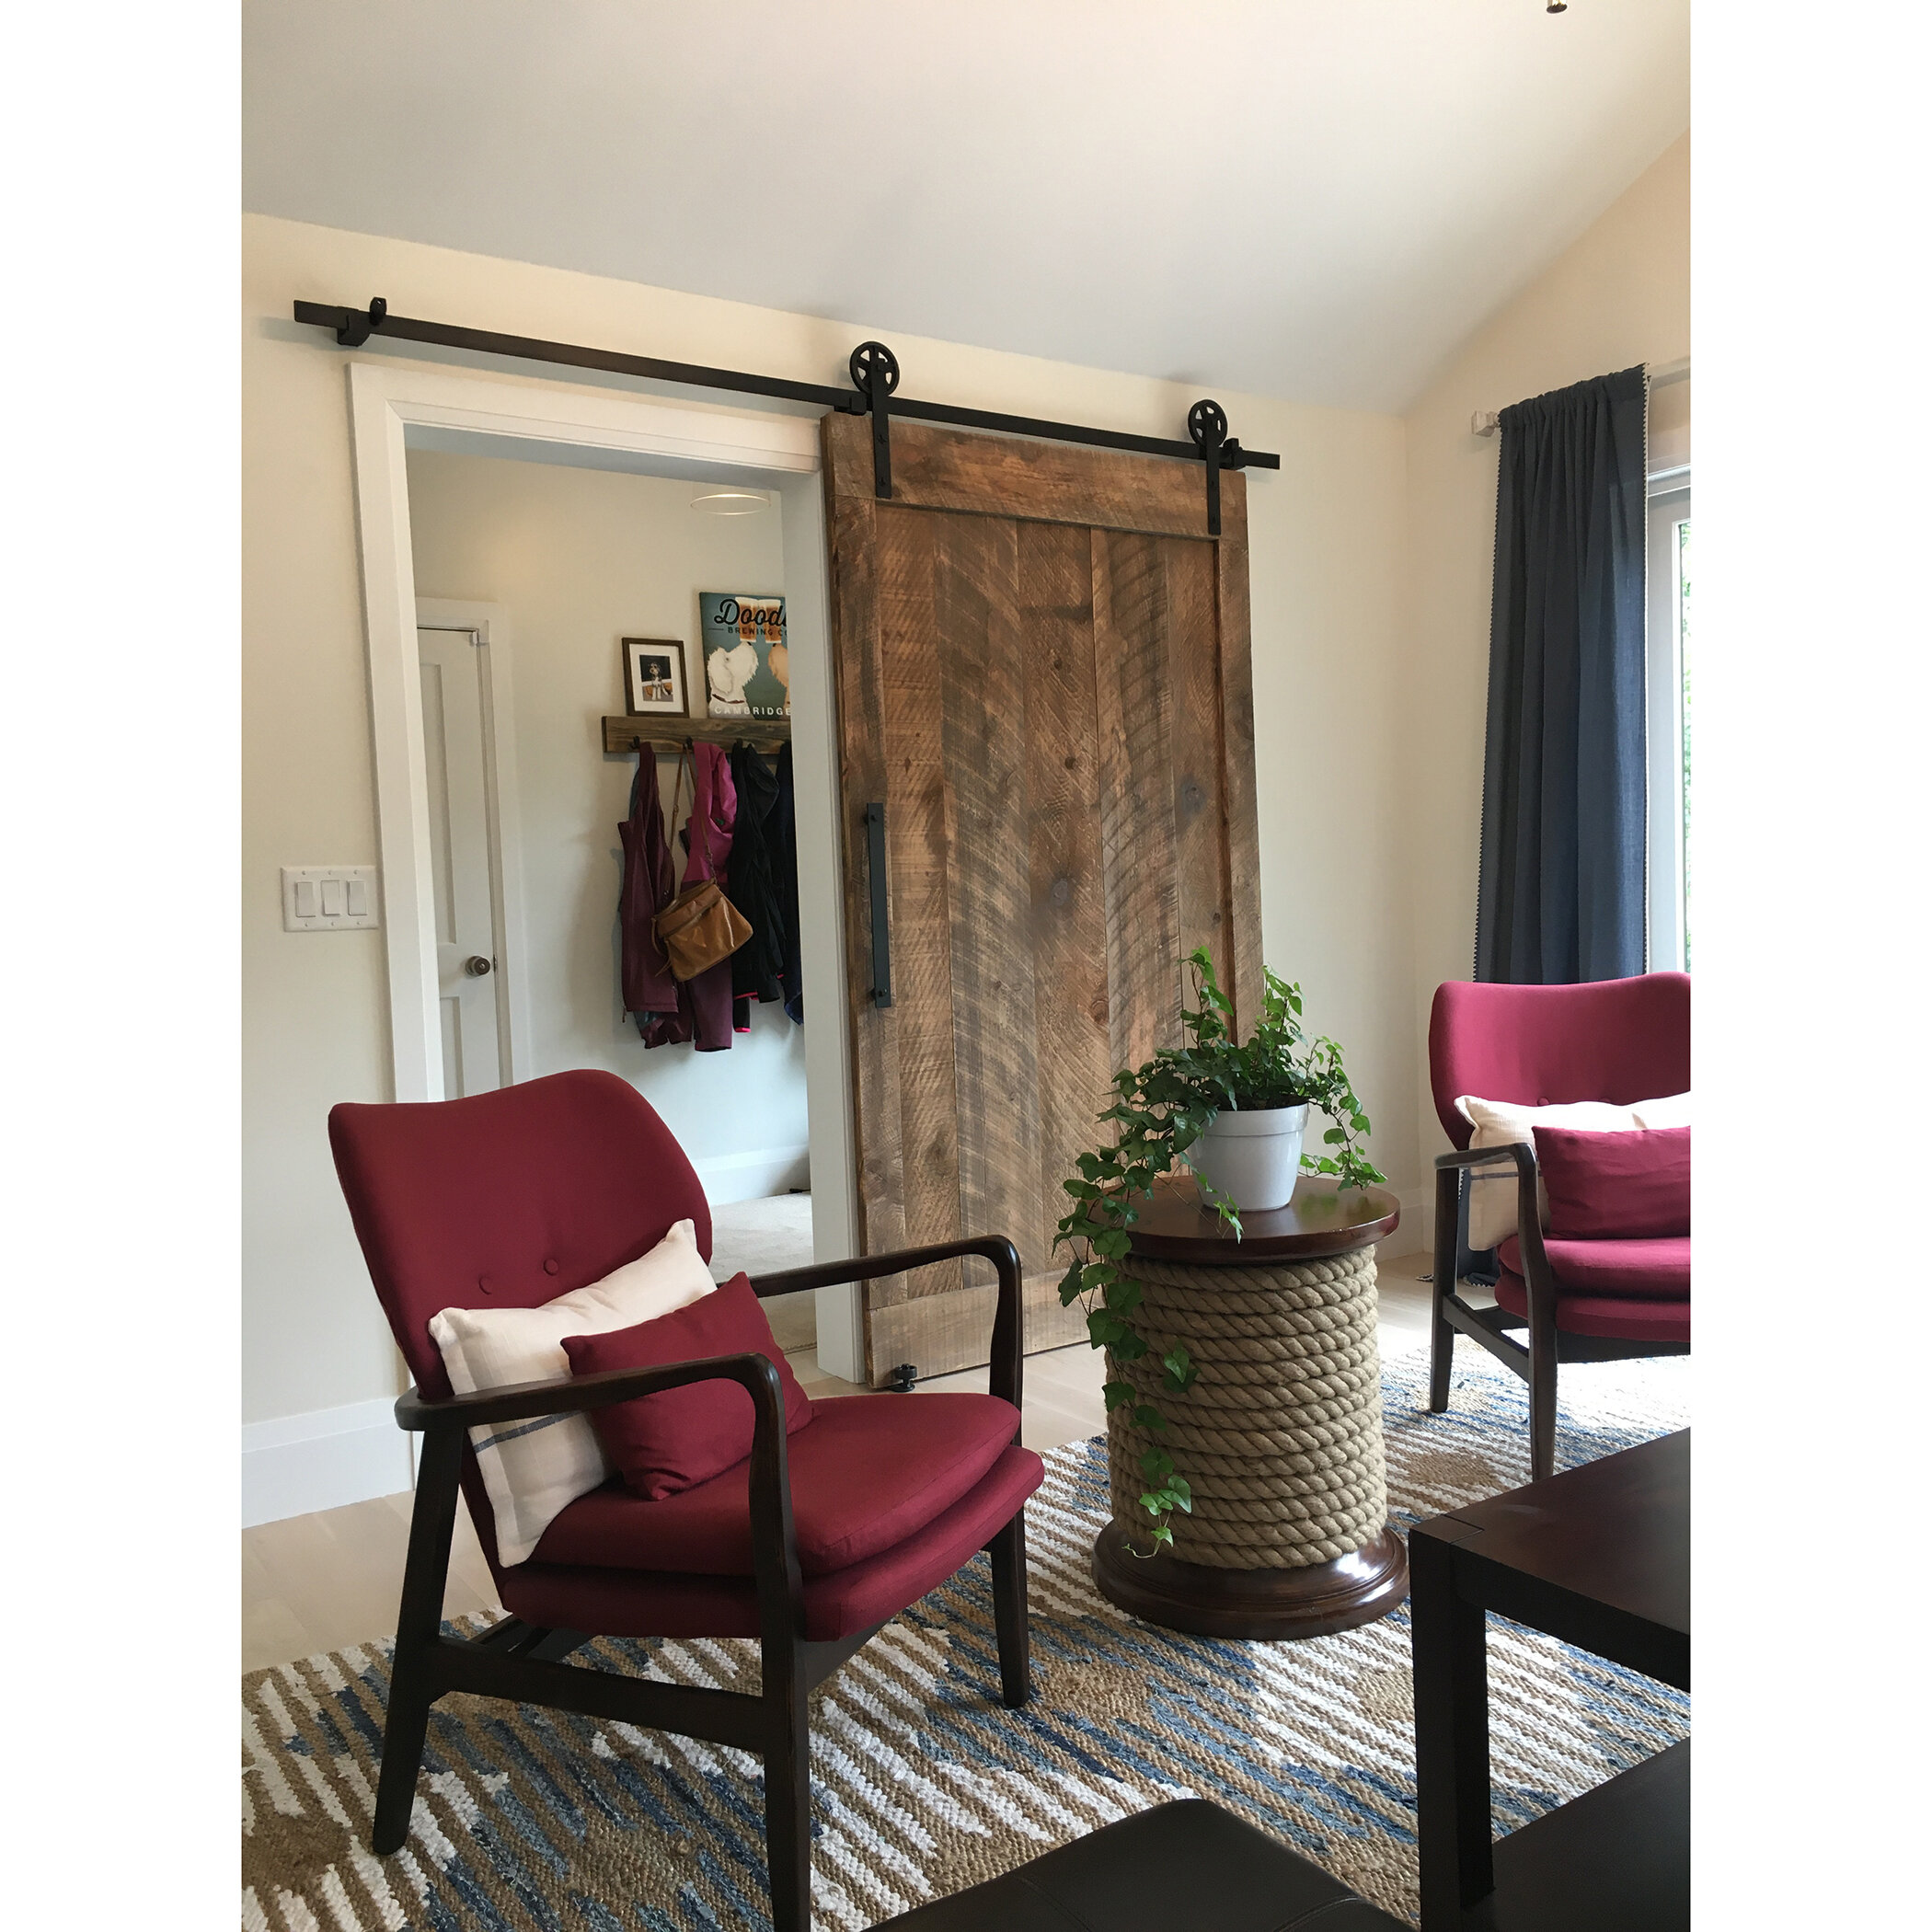
Note: Sliding barn doors are made WIDER than the outside edges of any casing/trim/molding around an entry, or if there is no casing, this is often referred to as a “finished drywall entry.” Sliding barn doors are made wider than the width of these entries. We will figure out the barn door width, and so to get started, we just need your actual entryway width and height and a few other details.
After you share some information and pictures with us, we have some easy discussions together about parts we offer such as the several wheel and handle options, styles of door patterns, wood coloring and more. We could chat live on one or more occasion to get everything just right. Some logistics and details may take some understanding and explaining on both our ends, and there are, of course, some projects which will require a visit anyway, in case some complex issues or unique door solutions might be in play.
For sharing photos with us: You could email them but often times, texting is even better than trying to send multiple attachments in emails. Once we connect we can chat about ways to share photos. The best pictures are often a wide view taken from further back where we can see the walls and floor and ceiling around an entry and if these are taken as straight-on as possible, that’s also helpful.
Site logistics: If we have never been to your home, we need to know some basic information about the space. Where is this door going, what floor, if there are many stairs or tight turns in halls, and how to access the home when we park the work van and set up for the installation day. We can chat about all of this so that getting large rectangles inside and hanging becomes seamless!
Where do we install?
We generally service areas within about an hour or so from our Northshore Mass location. We do serve Northern Vermont as well because we practically live there and The Barndoorist has accommodations in Stowe! And we will go anywhere where accommodations are taken care of. Distances involve travel and fuel and time so there are added costs (this does not apply to VT projects, which are also treated as local area work for us) but why not make a mini-vacation out of it? If you live far from us, let’s talk because who knows what can be done!
For further information
Below are some informative elements and logistics about entryways and barn doors. Some of these may help you understand how everything works in tandem and relates to the space when we design and install your doors. We can work with entryways that have casing/trim around them and ones that do not. We can work on new construction walls or most any finished wall but we prefer wood to be inside those walls, not metal or stone. If those materials are inside walls, we can discuss other options, because wood inside walls is the preferred means for our work.
Please see many of our latest creative door projects by visiting us on our Instagram page!
(If you do not use social media, kindly check out our portfolio page reflecting many of the same posts and new projects at this link: https://www.northshorebarndoors.com/our-portfolio)

Basic Door Entry Elements for those who want to know
Please feel free to download this image. This picture will guide you on how entrances are generally constructed and it can be used to help understand how wide or high a barn door must be when sliding over it. We typically like to make doors be at least 2” wider on BOTH sides than the OUTSIDE edges of any casing/trim, and if your space is a finished entry without casing, we recommend at least 3” wider on BOTH sides for the overall width of your door. Above the entry there needs to be room for the wheels to travel and we can even help with adding or changing doorway tops if needed. Not all doorways are the same and we can help you understand what is needed for us to make your customized door glide over your entryway perfectly!
When we make our doors, we make them WIDER than the outside edges of the casing of an entry. If there is no casing, we make them wider than a finished drywall entry. Typically we like at least 2” wider on either side, so your wall should have enough room to house a wide door when it is in the opened position. If there are obstructions or limited space, we can chat about many ways around most of this, and you can ask about many of our Unique Solutions (The link only shows a few of them and we have done many more neat workarounds!)

Still Renovating? Let us see inside the walls first — and please add BLOCKING!
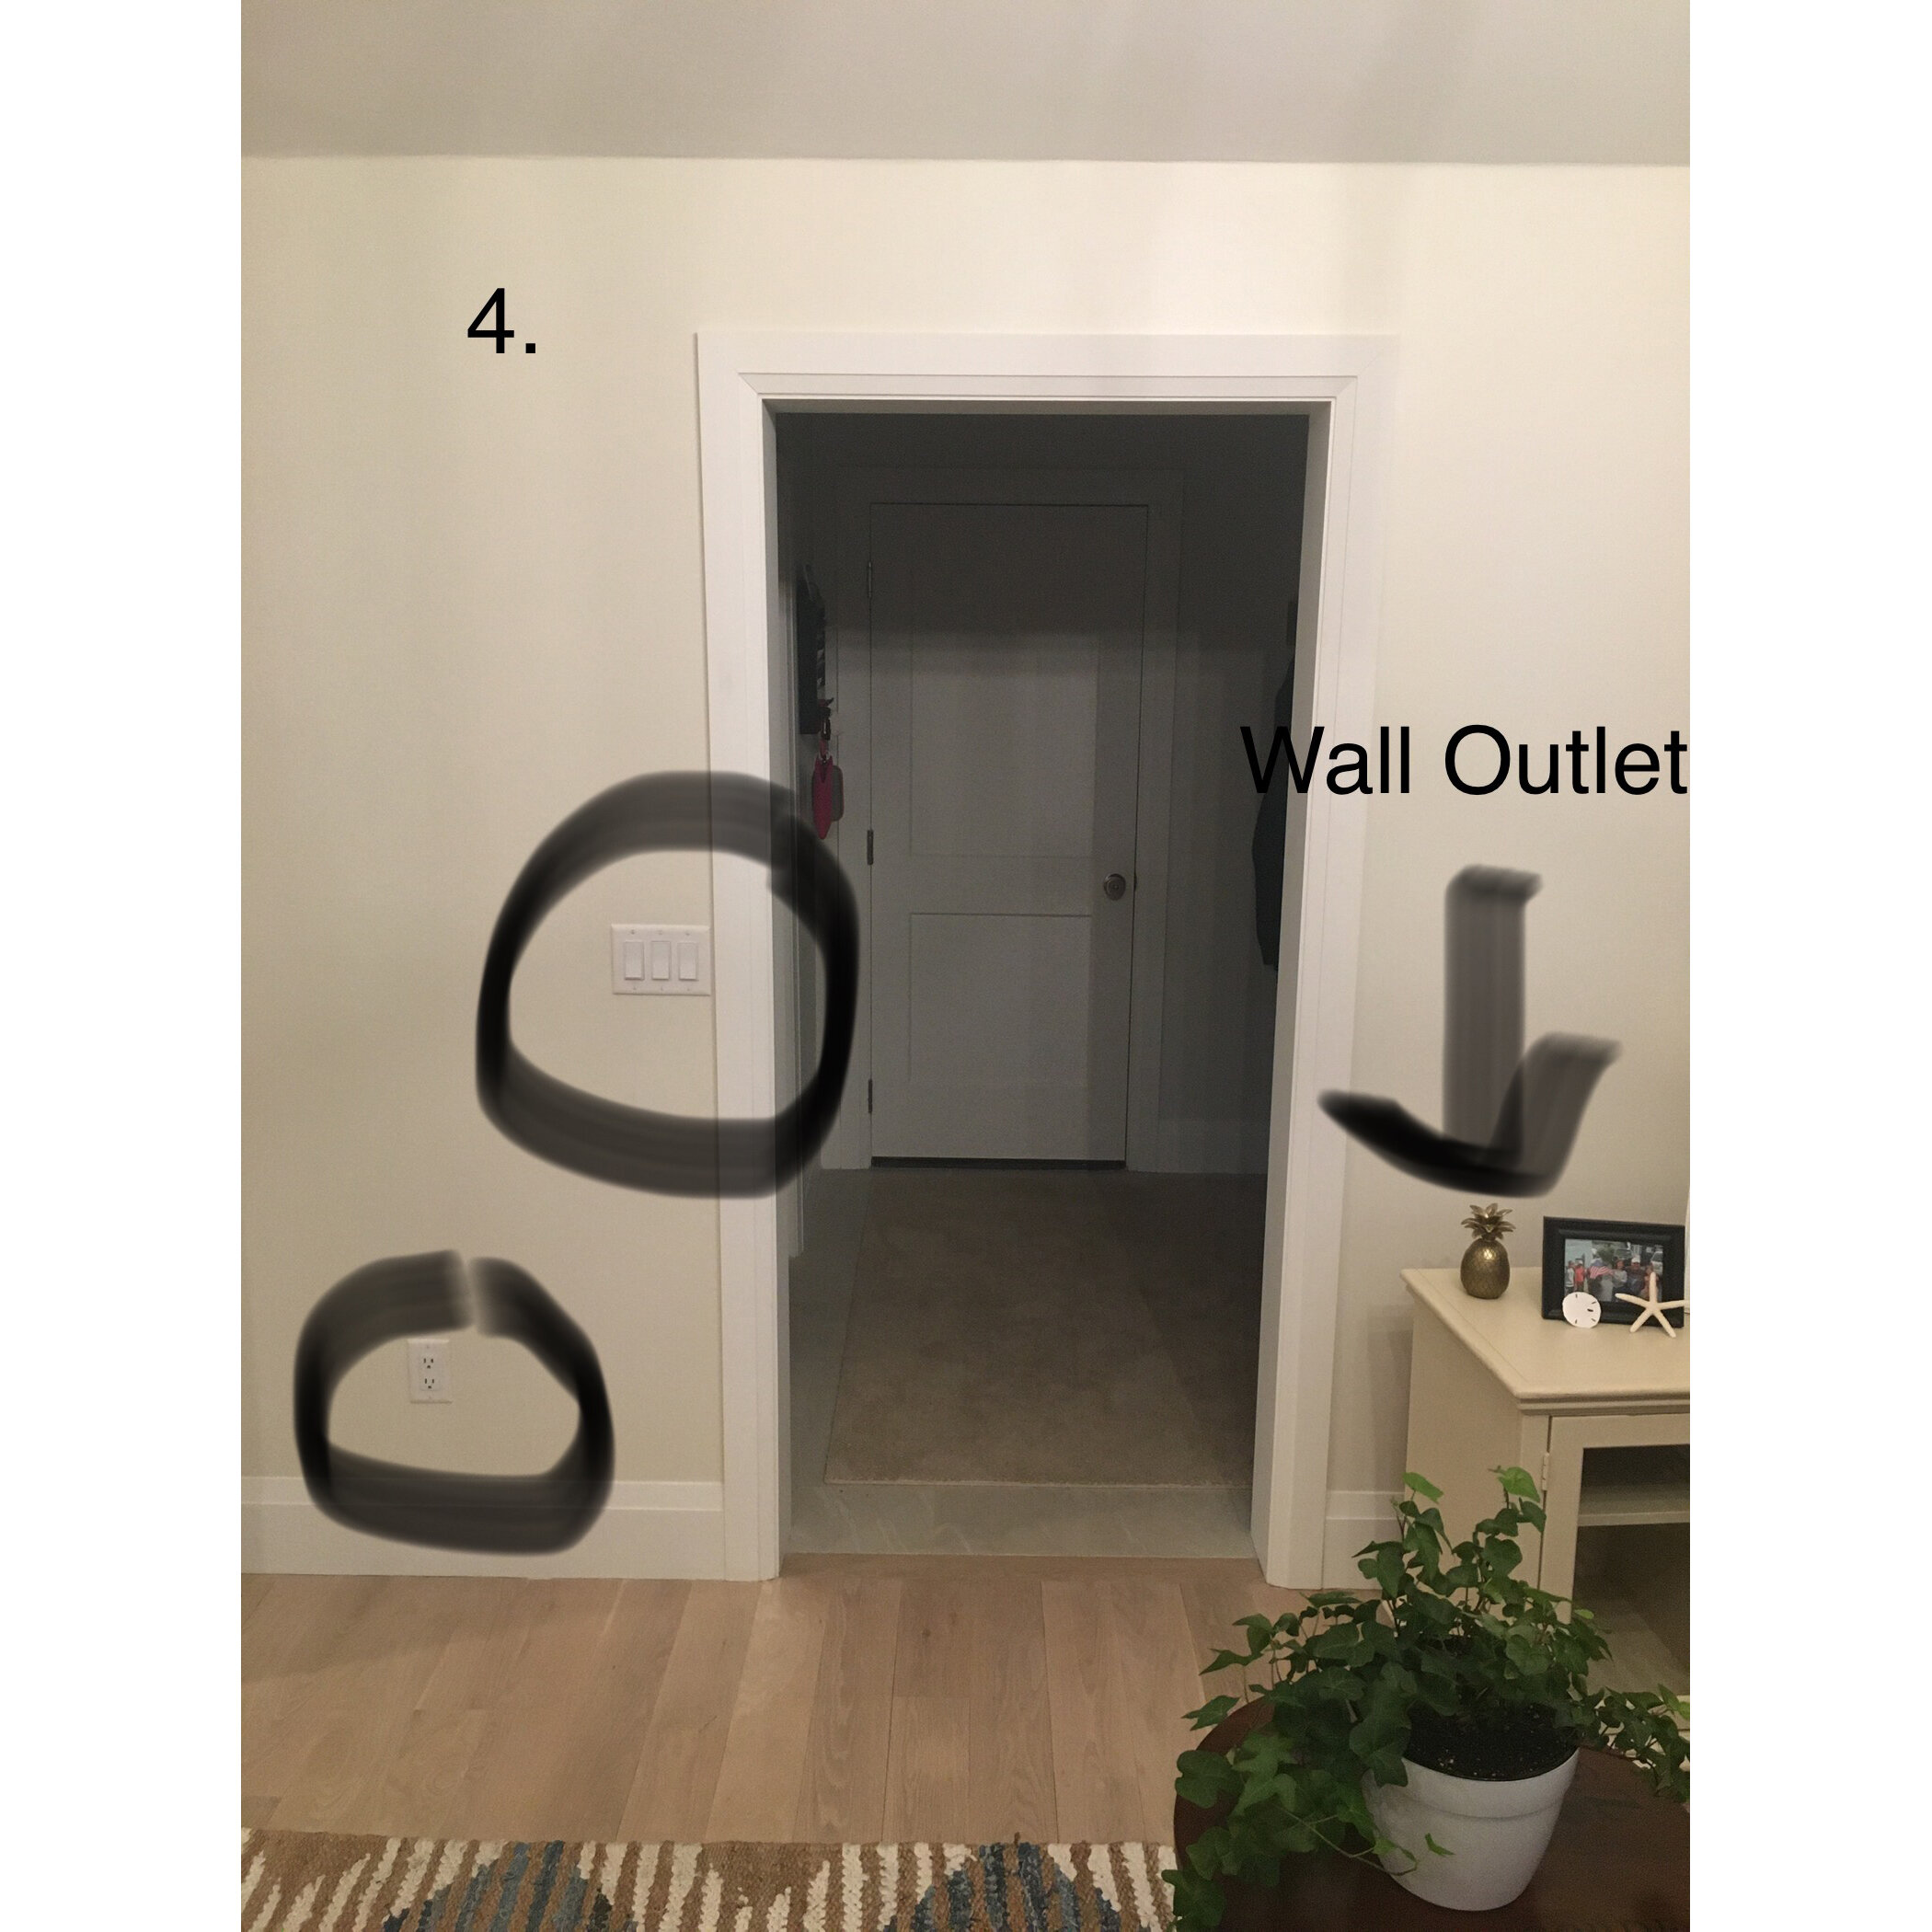
Blocking is wood used to fill spaces between studs and around wall elements. If you are rebuilding walls or doing new construction, we suggest adding as much blocking as possible: 10-12” up from the top header of a door entry is ideal, or to the ceiling if working in tight spaces. Have the blocking extend across to the left and/or right of the entry up there at least as wide as the entry itself. We ask that you snap a pic like this one to show us where any inside wall elements such as pipes, wires, etc may be located by simply running a tape measure across the space and letting us see as much of the inside of the wall as possible BEFORE You seal it up and plaster and paint. If you are doing new or renovated construction and you plan to add blocking, we will plan for this when designing your door elements and parts, and will need to rely on these details during installation. If it is done right, that helps everyone.
Our hardware may be lagged in higher than where many assume it will be. Please talk with us first if planning or still renovating so there is time to address this when the walls are still opened up. Proper planning will save money and time on all ends. We also need ample space above an entry and if there is not enough, we can sometimes add beams so sliding door systems can exist!

“Sides” or returns to hide that gap behind sliding doors!
Sliding barn doors do stick out from walls by nature. But once the door is hanging, we are not yet done We fashion side boards to add on the left and right of most doors so that the gap between the back of the wooden door and your wall or casing is mitigated to 1/4” to 1/2” in most cases! This feature makes it so bathrooms, home offices or other spaces are more closed off and private, helping with noise and light reduction while adding a more complete and robust look to the finished piece. The side boards are often fashioned on site to match with wall elements that may exist in your space such as protruding heaters, switches, thermostats, chair rails, prouder trim board and molding elements, and other features.
Walls and trim work can waver along a space. We fashion the side boards to accommodate the “run” of the door when it slides open or closed. There’s always a little play and variation and everything also related to the very much necessary base guides and rail stoppers we also install. Ask about how these work so your door stays on track at all times! One more thing… we do not install weather stripping at this time.
